
These Classic Halloween Party Brownies with a Spooky Mummy Finish are a fun way to celebrate the season. I remember one Halloween when my son, Jake, insisted on dressing up as a mummy. We had a blast making these brownies together, and now they’re a family favorite every year!
Table of Contents
Why You’ll Love It
- They’re easy to make and perfect for kids.
- The spooky finish adds a fun touch to any Halloween gathering.
- Rich chocolate flavor that everyone loves.
Pure Comfort
These brownies are pure comfort food. They’re fudgy, rich, and topped with a playful twist that makes them a hit at any Halloween party. Plus, they’re great for sharing with friends and family.
What You Need
- 2 sticks 1 cup unsalted butter – melted
- 400 g 2 cups granulated sugar – for sweetness
- 4 4 large eggs – room temperature
- 1 1 tsp vanilla extract – for flavor
- 120 g 1 cup all-purpose flour – sifted
- 100 g 1 cup unsweetened cocoa powder – for rich chocolate flavor
- 1 1 tsp baking powder – for leavening
- 1/2 1/2 tsp salt – to enhance flavor
- 6 oz 1 cup white chocolate chips – for mummy bandages
- 4 oz 1/2 cup chocolate frosting – for decorating
Time to Cook
Prep: 20 minutes | Cook: 30 minutes | Total: 50 minutes | Difficulty: Easy | Make-Ahead: Yes, you can make these a day in advance.
Steps to Make It
- Preheat your oven to 350 °F (175 °C). Grease a 9×13 inch baking pan with cooking spray or line it with parchment paper for easy removal later. You’ll want the oven nice and hot to get those brownies perfectly baked.
- In a large bowl, combine the melted butter and granulated sugar. Stir until the mixture is smooth and glossy. This will take about 2 minutes, and you’ll see it start to shine, which means you’re on the right track.
- Add the eggs one at a time, mixing well after each addition. Then stir in the vanilla extract. The batter should be thick and creamy, with a lovely aroma of vanilla filling your kitchen.
- In a separate bowl, whisk together the flour, cocoa powder, baking powder, and salt. Gradually add this dry mixture to the wet ingredients, stirring until just combined. Be careful not to overmix; you want those brownies to be fudgy.
- Pour the brownie batter into the prepared pan and spread it evenly. Bake for 30 minutes or until a toothpick inserted in the center comes out with a few moist crumbs. The edges should look slightly firm, while the center remains soft.
- Once baked, let the brownies cool in the pan for about 10 minutes. Then, transfer them to a wire rack to cool completely. This step is crucial for getting that perfect texture.
- After cooling, spread a thin layer of chocolate frosting over the top. This will act as the glue for your mummy decorations. It should be smooth and even, making it look like a delicious canvas.
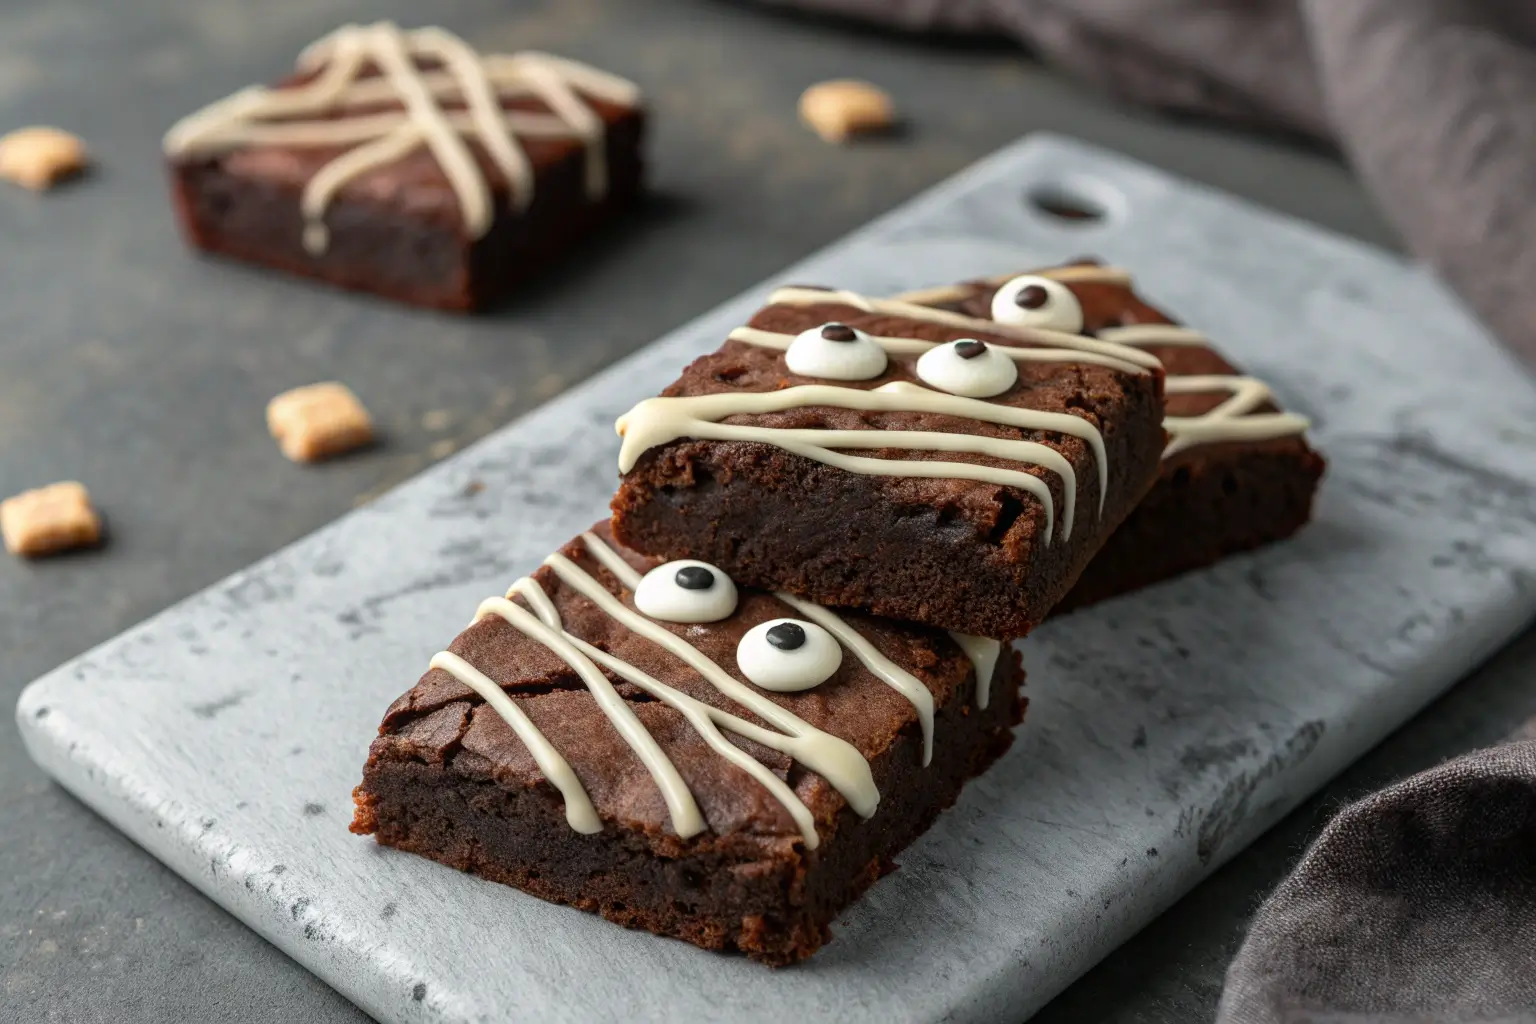
- Melt the white chocolate chips in the microwave in 30-second intervals, stirring in between until smooth. Use a piping bag or a zip-top bag with a corner snipped off to drizzle the melted chocolate over the brownies in a crisscross pattern, creating mummy bandages.
- Add two candy eyes on top of each brownie to give your mummies some character. Let the chocolate set for a few minutes before slicing into squares. They’re ready to be devoured!
Make It Perfect
- For a festive touch, use colored sprinkles instead of eyes.
- If you don’t have white chocolate chips, you can use melted candy melts instead.
- Make sure to let the brownies cool completely before frosting to prevent melting.
Mix It Up
- Add chopped nuts or chocolate chips for extra texture.
- Swap the white chocolate for dark chocolate for a richer flavor.
- Try adding a hint of peppermint extract for a seasonal twist.
Perfect Partners
- Serve with vanilla ice cream for a delightful contrast.
- Pair with hot cocoa or apple cider for a cozy treat.
💡 For more recipes, follow me on Facebook and Pinterest.
FAQs
Can I make these brownies ahead of time?
Absolutely! You can make them a day in advance and store them in an airtight container.
How should I store leftovers?
Keep leftovers in an airtight container at room temperature for up to 3 days.
Can I freeze these brownies?
Yes, you can freeze them! Wrap individual squares in plastic wrap and store in a freezer bag for up to 3 months.
What can I use instead of eggs?
You can use 1/4 cup of unsweetened applesauce or a flax egg as a substitute.
How do I know when the brownies are done?
Check for a toothpick inserted in the center; it should come out with a few moist crumbs.
Conclusion
These Classic Halloween Party Brownies are sure to be a hit at your next gathering. With their spooky mummy finish, they bring a fun twist to holiday baking Halloween. Enjoy making these with your family, and watch them disappear at the party!

Classic Halloween Party Brownies with a Spooky Mummy Finish
Equipment
- 9×13 inch baking pan
- Mixing Bowl
- Whisk
- microwave
- piping bag
Ingredients
Ingredients
- 1 cup sticks unsalted butter melted
- 2 cups g granulated sugar for sweetness
- 4 large eggs room temperature
- 1 tsp vanilla extract for flavor
- 1 cup g all-purpose flour sifted
- 1 cup g unsweetened cocoa powder for rich chocolate flavor
- 1 tsp baking powder for leavening
- 1/2 tsp salt to enhance flavor
- 1 cup oz white chocolate chips for mummy bandages
- 1/2 cup oz chocolate frosting for decorating
Instructions
- Preheat your oven to 350 °F (175 °C). Grease a 9×13 inch baking pan with cooking spray or line it with parchment paper for easy removal later. You’ll want the oven nice and hot to get those brownies perfectly baked.
- In a large bowl, combine the melted butter and granulated sugar. Stir until the mixture is smooth and glossy. This will take about 2 minutes, and you’ll see it start to shine.
- Add the eggs one at a time, mixing well after each addition. Then stir in the vanilla extract. The batter should be thick and creamy.
- In a separate bowl, whisk together the flour, cocoa powder, baking powder, and salt. Gradually add this dry mixture to the wet ingredients, stirring until just combined.
- Pour the brownie batter into the prepared pan and spread it evenly. Bake for 30 minutes or until a toothpick inserted in the center comes out with a few moist crumbs.
- Once baked, let the brownies cool in the pan for about 10 minutes. Then, transfer them to a wire rack to cool completely.
- After cooling, spread a thin layer of chocolate frosting over the top. This will act as the glue for your mummy decorations.
- Melt the white chocolate chips in the microwave in 30-second intervals, stirring in between until smooth. Use a piping bag or a zip-top bag with a corner snipped off to drizzle the melted chocolate over the brownies in a crisscross pattern.
- Add two candy eyes on top of each brownie to give your mummies some character. Let the chocolate set before slicing into squares.