Table of Contents
The original Rice Krispie Treat recipe is a timeless dessert loved for its simplicity and delightful taste. Whether you’re hosting a party or seeking a nostalgic snack, these no-bake treats are always a hit. For a twist on traditional sweets, consider trying other creative recipes like Apple Spice Cake for variety.
This article explores the original Rice Krispie Treat recipe, its origins, step-by-step instructions, and ways to customize the dessert for various preferences and occasions. Whether you’re making them for a party, as a quick snack, or to relive nostalgic memories, this guide has you covered!
The Origin of Rice Krispie Treats
Who Invented Rice Krispie Treats?
The beloved Rice Krispie Treats were first created in 1939 by Mildred Day and Malitta Jensen, who were staff members at the Kellogg Company’s Home Economics department. Initially developed as a fundraiser for Camp Fire Girls, these treats combined Rice Krispies cereal, marshmallows, and butter to create a delicious and cost-effective snack. Their simple preparation and satisfying taste quickly gained popularity beyond the initial scope of the fundraiser.
The Evolution of the Recipe Over the Years
While the original recipe has remained largely unchanged, the way people make and enjoy Rice Krispie Treats has evolved. Over time, creative bakers began adding personal touches such as chocolate chips, peanut butter, sprinkles, and even different types of cereal. Additionally, the recipe adapted to suit dietary needs, giving rise to gluten-free, vegan, and low-sugar variations.
Despite these innovations, the original recipe remains iconic. It’s often printed on the back of Kellogg’s Rice Krispies cereal boxes, ensuring that new generations can easily discover and enjoy this classic dessert.
Ingredients for Original Rice Krispie Treat Recipe
List of Ingredients
The original Rice Krispie Treat recipe calls for only three key ingredients, making it one of the simplest desserts to prepare. Here’s what you’ll need:
- Rice Krispies Cereal (6 cups): The classic puffed rice cereal that gives the treats their light and crispy texture.
- Mini Marshmallows (10 ounces): Mini marshmallows melt evenly and bind the cereal together with their gooey sweetness. You can also use regular marshmallows if mini ones aren’t available.
- Unsalted Butter (3 tablespoons): Butter adds richness and helps the marshmallows achieve the perfect consistency for coating the cereal.
Optional Ingredients for Enhanced Flavor
While the original recipe keeps things simple, you can add a few extra ingredients for variety:
- Vanilla Extract (1 teaspoon): For a subtle flavor boost.
- Pinch of Salt: Balances the sweetness of the marshmallows.
- Decorative Toppings: Sprinkles, chocolate chips, or candy pieces can make the treats festive.
Alternatives and Substitutions
Dietary restrictions or personal preferences might require some tweaks to the original recipe:
- Vegan Version: Replace butter with plant-based margarine and use vegan marshmallows.
- Low-Sugar Option: Opt for sugar-free or low-sugar marshmallows.
- Gluten-Free Adaptation: Ensure the cereal used is labeled gluten-free, as some puffed rice cereals may contain gluten.
Pro Tip for Best Results
Using fresh marshmallows is crucial for achieving the ideal gooey texture. Stale marshmallows can result in a denser and less appealing treat.

Step-by-Step Instructions
Preparation Time and Tools Needed
Making Rice Krispie Treats is a quick and straightforward process, perfect for both beginners and seasoned cooks. Here’s what you’ll need:
- Preparation Time: Approximately 10 minutes.
- Cooling Time: About 30 minutes.
- Tools: A large pot, a mixing spoon or spatula, a 9×13-inch baking dish, and wax or parchment paper.
Easy-to-Follow Cooking Process
- Prepare Your Workspace
- Grease the 9×13-inch baking dish lightly with butter or non-stick cooking spray. This prevents the mixture from sticking during cooling.
- Lay out all your ingredients to ensure a smooth process.
- Melt the Butter
- In a large pot, melt 3 tablespoons of unsalted butter over low heat. Stir gently to avoid browning the butter, as this can alter the taste of the final product.
- Add the Marshmallows
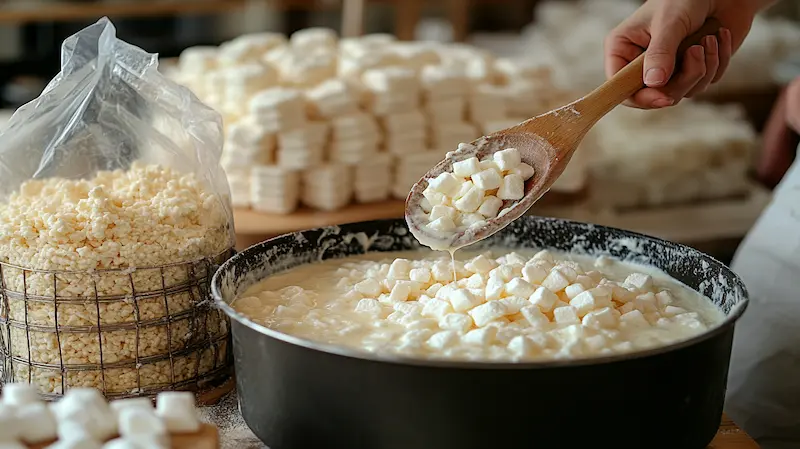
- Once the butter has fully melted, add the 10 ounces of mini marshmallows to the pot.
- Stir constantly over low heat until the marshmallows are fully melted and blended with the butter. This creates the gooey base for the treats.
- Incorporate the Rice Krispies Cereal
- Remove the pot from heat and immediately add 6 cups of Rice Krispies cereal.
- Stir quickly but carefully, ensuring that all the cereal is evenly coated with the melted marshmallow mixture.
- Transfer the Mixture to the Baking Dish
- Pour the mixture into the prepared baking dish. Use a spatula or spoon coated with butter or cooking spray to press the mixture gently into an even layer. Avoid pressing too hard, as this can make the treats dense.
- Cool and Set
- Let the treats cool at room temperature for about 30 minutes. For faster results, you can place the dish in the refrigerator for 15 minutes.
- Slice and Serve
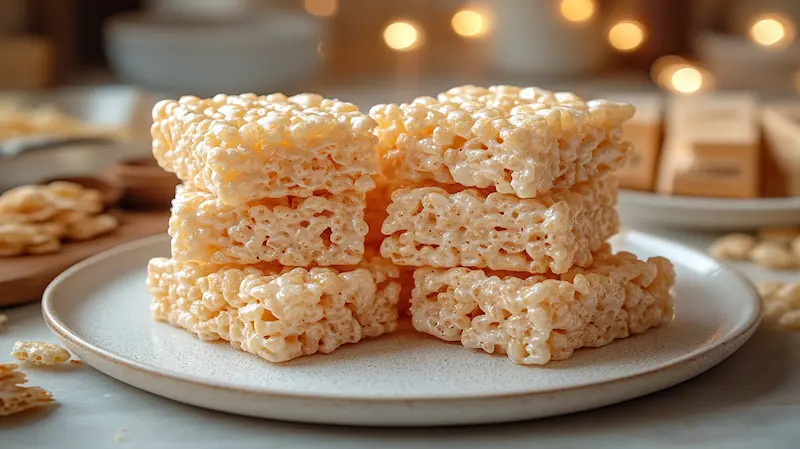
- Once cooled, use a buttered knife to cut the treats into squares or rectangles. Enjoy them immediately, or store them for later.
Pro Tips for a Perfect Batch
- Work Quickly: The marshmallow mixture hardens as it cools, so mix and press it into the dish without delay.
- Add-Ins: For a twist, fold in chocolate chips, dried fruit, or crushed candies while mixing in the cereal.
Tips and Tricks for Perfect Rice Krispie Treats
How to Achieve the Ideal Texture and Consistency
- Use Fresh Ingredients
- Fresh marshmallows and cereal are key to achieving the best results. Stale ingredients can lead to dense or chewy treats instead of light, airy ones.
- Control the Heat
- Melt the butter and marshmallows over low heat. High heat may cause the marshmallows to scorch or caramelize, altering the taste and making the mixture difficult to handle.
- Grease Your Tools
- Coat your spatula or mixing spoon with butter or non-stick spray to prevent the sticky marshmallow mixture from clinging to the utensil while stirring or pressing it into the pan.
- Avoid Over-Pressing the Mixture
- When transferring the mixture to the pan, press it down lightly and evenly. Over-compressing can make the treats hard instead of pleasantly chewy.
Storing Rice Krispie Treats for Freshness
- Short-Term Storage
- Store the treats in an airtight container at room temperature. This keeps them fresh for up to 2-3 days without refrigeration.
- Long-Term Storage
- For longer shelf life, wrap each treat individually in plastic wrap, then place them in a freezer-safe bag or container. Frozen treats can last up to 6 weeks. Allow them to thaw at room temperature before serving.
- Preventing Sticking
- Use wax or parchment paper to separate layers of treats when storing them. This prevents the squares from sticking together.
Common Mistakes to Avoid
- Skipping the Grease
- Forgetting to grease your pan or utensils can make cleanup unnecessarily difficult and result in treats that stick to the dish.
- Overcooking the Marshmallows
- Cooking the marshmallow mixture for too long or on high heat can result in a stiff, less enjoyable texture.
- Ignoring Measurements
- Accurate ingredient measurements are crucial. Too much cereal will result in dry treats, while too much marshmallow can make them overly sticky and difficult to handle.
Bonus Tip for Creativity
To make the treats more visually appealing, use cookie cutters to shape them into stars, hearts, or other fun designs. This is especially popular for parties, holidays, or school events.
Variations on the Original Recipe
Adding Exciting Flavors and Ingredients
- Chocolate Drizzle or Chips
- Melted chocolate can be drizzled over the top of the treats for a decadent twist. Alternatively, mix chocolate chips into the marshmallow and cereal mixture for bursts of flavor in every bite.
- Peanut Butter Bliss
- Add a few tablespoons of creamy peanut butter to the melted marshmallow mixture for a nutty, rich flavor. This variation is a favorite among peanut butter lovers.
- Sprinkles and Candy Pieces
- Fold in colorful sprinkles or small candy pieces like M&Ms for a fun and festive treat. This is perfect for birthdays or celebrations.
Chocolate chips, sprinkles, or nut butter can elevate your treats. For more unique dessert inspirations, explore Unique Cookie Recipes.
Festive and Seasonal Variations
- Holiday-Themed Treats
- Use food coloring to tint the marshmallow mixture for holidays: green for St. Patrick’s Day, orange for Halloween, or red and green for Christmas. Add corresponding decorations like candy canes or edible glitter for extra flair.
- Pumpkin Spice Rice Krispie Treats
- Incorporate a teaspoon of pumpkin spice into the marshmallow mixture for a fall-inspired twist. Pair with orange food coloring to mimic autumn leaves.
- Valentine’s Day Hearts
- Use a heart-shaped cookie cutter to create romantic treats. Add pink or red food coloring and top with heart-shaped sprinkles.
Add holiday flair with food coloring or themed decorations. Pair this idea with Sweet Potato Cornbread for a well-rounded festive menu.
Different Cereals for Unique Textures
- Fruity Pebbles
- Replace Rice Krispies cereal with Fruity Pebbles for a colorful, fruit-flavored variation.
- Cocoa Krispies
- Substitute with Cocoa Krispies for a chocolaty version of this classic dessert.
- Cheerios or Cornflakes
- Use these cereals for a slightly different texture and flavor, offering a more robust crunch.
Replace marshmallows with nut-based binders for a healthier version. Learn more about using alternatives like nut milk in “Can Vitamix Make Nut Milk?”.
Layered and Dipped Treats
- Layered Bars
- Create a layered dessert by spreading melted chocolate or peanut butter between two layers of Rice Krispie Treats.
- Dipped Edges
- Dip the edges of each square into melted chocolate or white chocolate, then roll them in crushed nuts or sprinkles for a gourmet presentation.
Tips for Customizing Flavors
- Experiment with extracts like almond, peppermint, or coconut to subtly change the flavor profile.
- Add a pinch of cinnamon or nutmeg for a warm, spiced variation.
When making Rice Krispie Treats, use fresh marshmallows and avoid over-compressing the mixture to ensure a chewy consistency. Complement these tips with savory menu items like Brown and Serve Dinner Rolls to create a balanced spread.
From indulgent chocolate creations to seasonal masterpieces, these variations prove that Rice Krispie Treats are incredibly versatile.

Healthier Versions of Rice Krispie Treats
Using Better-for-You Ingredients
- Low-Sugar Marshmallows
- Replace traditional marshmallows with low-sugar or sugar-free alternatives to reduce the overall sweetness without compromising the treat’s signature texture.
- Natural Sweeteners
- Opt for natural sweeteners like honey, maple syrup, or agave nectar as a binding agent instead of marshmallows. Combine them with almond butter or coconut oil for a healthier twist.
- Organic Ingredients
- Use organic versions of puffed rice cereal, butter, and marshmallows for a cleaner, less processed version of this classic snack.
Incorporating Nutrient-Rich Additions
- Dried Fruits
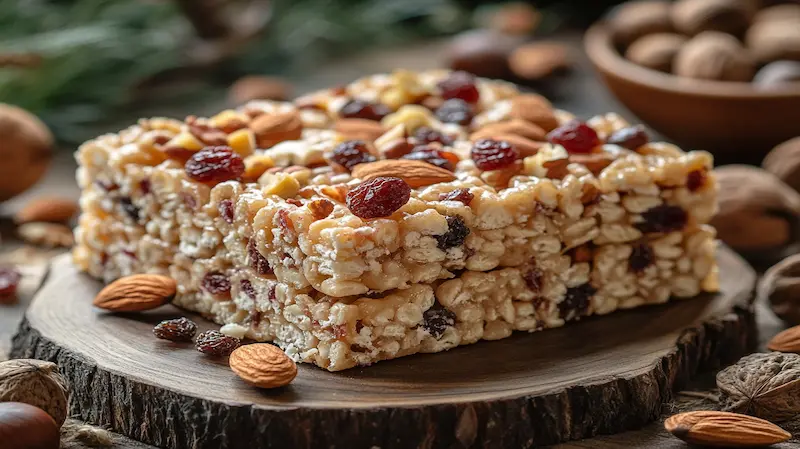
- Add chopped dried fruits such as cranberries, raisins, or apricots for a hint of natural sweetness and chewy texture.
- Nuts and Seeds
- Incorporate almonds, walnuts, or sunflower seeds for a crunchy element and a boost of healthy fats and protein.
- Protein Powder
- Mix in a scoop of your favorite protein powder during the marshmallow-melting step for a snack that’s both tasty and filling.
Alternative Binders and Cereals
- Nut Butter Base
- For a marshmallow-free option, bind the cereal with melted almond butter, cashew butter, or peanut butter mixed with honey or coconut oil.
- Alternative Cereals
- Use cereals made from whole grains, like puffed quinoa or bran flakes, for a heartier, fiber-packed version.
- Coconut Oil Swap
- Replace butter with coconut oil for a dairy-free option that adds a subtle coconut flavor.
Vegan and Gluten-Free Versions
- Vegan Substitutes
- Choose vegan marshmallows and plant-based butter or coconut oil for a completely dairy- and gelatin-free treat.
- Gluten-Free Adaptation
- Ensure the cereal used is labeled gluten-free, as some puffed rice products may contain traces of gluten.
Portion Control and Presentation
- Miniature Bites
- Instead of making large squares, form smaller bite-sized treats for easier portion control.
- Muffin Tin Shapes
- Press the mixture into muffin tins for individual servings. These are great for meal prepping snacks or as party favors.
Why Choose Healthier Options?
Healthier versions of Rice Krispie Treats offer the same satisfaction while catering to dietary needs, reducing sugar intake, or increasing nutritional value. They’re perfect for those seeking guilt-free indulgence or snacks that align with a balanced lifestyle.
Frequently Asked Questions (FAQs)
What are the original ingredients in Rice Krispies Treats?
The original Rice Krispie Treat recipe uses three simple ingredients: Rice Krispies cereal, mini marshmallows, and butter. These ingredients are combined to create a chewy, crispy, and sweet dessert. The recipe’s simplicity has made it a timeless favorite.
Why did Rice Krispies change?
Over the years, Kellogg’s has occasionally updated the formulation of Rice Krispies cereal to adapt to consumer preferences, including changes in flavor, texture, or fortification with vitamins and minerals. Additionally, certain markets have introduced gluten-free or flavored versions of the cereal. However, the changes don’t significantly affect the classic treat’s recipe, which remains beloved.
Why are my homemade Rice Krispie Treats so hard?
Homemade Original Rice Krispie Treat Recipe often turn out hard due to overcooking the marshmallow and butter mixture or pressing the mixture too firmly into the pan. To prevent this, melt the marshmallows gently over low heat and press the mixture into the pan lightly with a greased spatula to retain a soft, chewy texture.
Can I use marshmallow fluff instead of marshmallows?
Yes, you can substitute marshmallow fluff for mini marshmallows in the recipe. Use approximately one jar (7 ounces) of marshmallow fluff to replace a 10-ounce bag of mini marshmallows. The texture may vary slightly, but the taste will remain sweet and delicious.
What is the best way to store Rice Krispie Treats?
Store Rice Krispie Treats in an airtight container at room temperature for up to 3 days. To prevent sticking, layer the squares with parchment or wax paper. For longer storage, individually wrap the treats in plastic wrap and freeze them in a sealed bag for up to 6 weeks. Thaw at room temperature before serving.
Can I customize Rice Krispie Treats for special occasions?
Absolutely! You can customize them by adding food coloring, sprinkles, or candy pieces to match a theme or occasion. For holidays, consider shaping the treats using cookie cutters or adding festive toppings like crushed candy canes or chocolate drizzle.
Conclusion
Original Rice Krispie Treat Recipe are a beloved classic, cherished for their simplicity, versatility, and universal appeal. The original recipe, consisting of Rice Krispies cereal, butter, and marshmallows, has stood the test of time, bringing joy to countless households. Whether you’re making them as a nostalgic snack or exploring creative variations, they’re always a crowd-pleaser.
From the perfect gooey texture to healthier adaptations and festive customizations, these treats can be tailored to suit any occasion or preference. With proper techniques and a little imagination, you can create Rice Krispie Treats that are soft, delicious, and uniquely your own. So why not grab a box of Rice Krispies, gather your ingredients, and try making a batch today?

Rice Krispie Treats
Ingredients
Main Ingredients
- 6 cups Rice Krispies Cereal Classic puffed rice cereal.
- 10 ounces Mini Marshmallows You can substitute with regular marshmallows.
- 3 tablespoons Unsalted Butter Adds richness to the mixture.
Optional Ingredients
- 1 teaspoon Vanilla Extract For flavor enhancement.
- 1 pinch Salt Balances sweetness.
- Decorative Toppings (Sprinkles, chocolate chips, or candy pieces) Optional for festive presentation.
Instructions
Preparation
- Grease a 9x13-inch baking dish with butter or non-stick spray.
- Lay out all ingredients for smooth preparation.
Cooking
- In a large pot, melt the unsalted butter over low heat.
- Once melted, add mini marshmallows and stir constantly until they are fully melted and combined.
- Remove from heat and add Rice Krispies cereal immediately, stirring quickly until all cereal is evenly coated.
Cooling and Serving
- Pour the mixture into the prepared baking dish and press gently to create an even layer.
- Allow the treats to cool at room temperature for about 30 minutes, or refrigerate for faster setting.
- Once cooled, slice into squares and enjoy, or store for later.

